 SHOP PRODUCTS ON SALE NOW
 of 6000+ Reviews
 EXPRESS NEXT DAY DELIVERY
Dog grooming clippers should make your work easier, not harder. When they start pulling, overheating, losing power, or leaving a poor finish, grooming becomes frustrating for both you and the dog.
In many cases, the problem is not the clipper itself. More often, it comes down to blade condition, coat preparation, heat build-up, battery habits, or using the wrong clipper for the job. That is why even experienced groomers do not rely on one machine alone. They build a setup that suits different coats, different tasks, and different dogs.
If you are still comparing options, our full range of dog grooming clippers and trimmers covers everything from professional salon equipment to lightweight tools for precise finishing touches.
Contents
- 1 Why clipper problems are often not clipper faults
- 2 Clippers are not cutting properly
- 3 Clippers are pulling or snagging the coat
- 4 The blade is getting too hot
- 5 Cordless clippers are losing power too quickly
- 6 The clipper suddenly sounds rougher or louder
- 7 Clippers are leaving track marks
- 8 A clipper works on light coats but struggles on thick coats
- 9 The blade keeps clogging mid-groom
- 10 The clipper stops in the middle of a groom
- 11 Detail work feels awkward
- 12 The habits that cause the biggest clipper problems
- 13 Final thoughts
- 14 Dog grooming scissor maintenance – FAQs
- 14.0.1 How often should dog grooming scissors be oiled?
- 14.0.2 How often should grooming scissors be sharpened?
- 14.0.3 Why are my grooming scissors folding the coat?
- 14.0.4 How do I check grooming scissor tension?
- 14.0.5 Can you sharpen dog grooming scissors at home?
- 14.0.6 How should grooming scissors be stored?
Why clipper problems are often not clipper faults
When the clippers stop performing properly, many people assume the machine has worn out. Sometimes that is true, but usually the cause is simpler. A dirty blade, a badly prepped coat, or the wrong tool for the coat type will affect cutting performance long before the clipper body actually fails.
This is also why buying decisions matter. A lighter one that works beautifully for paws, faces, and tidy-ups may struggle on dense body coats, while a heavier-duty tool may be less comfortable for delicate finishing work. We cover that broader setup in our dog grooming clippers guide, while our guide to corded vs cordless dog clippers explains how clipper type changes power, flexibility, and day-to-day workflow.
Clippers are not cutting properly
One of the most common complaints is that clippers are running, but not actually cutting cleanly. They may skim over the coat, leave uneven patches, or force you to go over the same area several times.
This usually comes back to a few core issues:
- A dull blade
- Hair packed into the blade
- A dry blade that has not been oiled
- Clipping on a dirty or damp coat
- Using the wrong blade for the coat or finish required
Before blaming the clipper, start with the blade. Clean it, oil it, and swap it for another if you can. In real grooming, blade condition often matters more than the clipper body itself. If you need replacements or want to expand your options, our range of dog grooming A5 blades, wider blades and attachments is often the first place to check.
Clippers are pulling or snagging the coat
If the clippers are pulling hair instead of gliding through it, the dog will feel it immediately. This is one of the fastest ways to make grooming uncomfortable and create tension at the grooming table.
Pulling usually happens when the blade is blunt, dry, clogged, or being asked to work through a coat that has not been prepared properly. Clippers are not designed to force their way through knots, compacted coat, grease, or dampness. Even a good one will feel rough if the coat is fighting back.
A few checks usually solve the problem:
- Make sure the coat is fully dry
- Brush and comb through before clipping
- Oil the blade properly
- Clear trapped coat from the blade during the groom
- Change the blade if it has gone dull
Good prep protects both the clipper and the finish. That is why a reliable set of dog brushes and dog combs is just as important as the clipper itself.
The blade is getting too hot
Hot blades are a normal risk in grooming, especially on dense coats or during longer sessions. The key is not to act surprised when heat builds up, but to manage it properly before it becomes a problem.
Blade heat usually builds faster when:
- The coat is dirty
- The blade is dry
- The same blade is used for too long without a break
- The blade is dull and creates extra friction
- You are working through a thick or resistant coat
A simple routine makes a big difference. Oil the blade regularly, stop to check the temperature, rotate between blades where possible, and do not clip on a badly prepared coat. If the dog is sensitive or the coat is heavy, heat can build very quickly, so regular pauses are part of good practice, not lost time.
Cordless clippers are losing power too quickly
Cordless clippers are brilliant for flexibility, but they can become frustrating if the runtime drops off sooner than expected. Sometimes that is simply battery age. Sometimes it is a sign that the clipper is being pushed beyond the type of work it is best suited to.
If a cordless clipper seems to be losing power quickly, look at the full picture:
- Was the battery fully charged?
- Is the battery ageing?
- Is the blade dull, and making the motor work harder?
- Are you using a finishing clipper on heavy body work?
- Are batteries being stored badly between grooms?
In many cases, the fix is not replacing cordless clippers completely, but pairing them with a stronger main machine. A lot of groomers get better long-term results by using cordless dog clippers for flexibility and quieter work, while keeping corded dog clippers for heavier body clipping.
The clipper suddenly sounds rougher or louder
A change in sound is often an early warning sign. If a clipper starts buzzing more harshly, rattling, vibrating more in the hand, or sounding strained in the coat, it is worth stopping to check it properly.
Sometimes the cause is simple, such as hair packed into vents or around the blade drive. Sometimes the blade is damaged or dry. Sometimes the clipper is being strained by a coat that has not been prepared properly. Cleaning the machine carefully and testing it with a different blade will often tell you whether the problem is with the blade or the clipper body.
If the noise continues, it may be time to look at servicing or replacement parts.
Clippers are leaving track marks
Track marks are frustrating because they make the finish look untidy even when the groom itself has gone well. This is especially noticeable on coats that show every line.
Usually, track marks come from a combination of poor prep and poor blade performance. Damp coat, weak fluff-drying, a dull blade, or inconsistent pressure can all leave lines behind. Better prep usually improves the result faster than changing clipper bodies.
For a cleaner finish, focus on the basics:
- Clip only on a properly dried coat
- Use a sharp, clean blade
- Keep your passes even
- Prepare the coat thoroughly before clipping
That is why dryer choice matters more than many groomers first realise. Proper coat preparation starts earlier in the grooming process, which is why it’s worth exploring our guides on dog grooming dryers and blasters, as well as our breakdown of single motor vs double motor grooming dryers, alongside any clipper advice.
A clipper works on light coats but struggles on thick coats
This is often a setup issue rather than a fault. Some clippers are built for light maintenance, finishing, and sensitive areas. Others are made for bulk coat removal and regular salon use. Expecting one machine to do both perfectly is often where frustration starts.
If a clipper performs well on light coats but struggles on dense or resistant coats, it may simply be the wrong main tool for the job. A more practical setup is often:
- a stronger clipper for body work
- a lighter clipper for flexibility and finishing
- a trimmer for tight or delicate areas
That thinking also lines up well with your existing content. Someone still choosing their first setup can move naturally from this article into Top Dog Grooming Clippers for Beginners, which keeps the content hub tight without duplicating this troubleshooting angle.
The blade keeps clogging mid-groom
A blade that keeps filling with hair slows everything down and often leads people to think the clipper is underpowered. In reality, clogged blades are usually linked to coat condition, heavy debris, product build-up, or not clearing the blade often enough during work.
You can reduce clogging by clipping on a cleaner coat, brushing out loose coat first, and stopping briefly to clear the blade before the problem builds. On heavier coats, keeping more than one blade ready is often quicker than trying to force one blade to do too much.
The clipper stops in the middle of a groom
A clipper cutting out mid-groom feels dramatic, but the cause is often straightforward. The battery may be flat, the blade may be jammed, the machine may have overheated, or a cable may not be seated properly on a corded model.
Before assuming the clipper has failed, check:
- battery charge
- blade blockage
- temperature
- power connection
- a second blade if available
If it keeps cutting out after those checks, then it is more likely to need proper servicing. This is also why professionals rarely rely on one machine alone.
Detail work feels awkward
Sometimes the issue is not power or blade condition. It is simply using the wrong tool in the wrong place. Full-sized clippers can feel bulky around eyes, ears, paw pads, and hygiene areas, even when they are cutting perfectly well elsewhere.
That is where a dedicated trimmer makes grooming easier and safer. Instead of forcing a large clipper into small spaces, it makes more sense to keep dog grooming trimmers or dog grooming mini trimmers as part of the wider setup.
The habits that cause the biggest clipper problems
Most clipper problems build gradually rather than appearing all at once. The habits that cause the most trouble are usually simple:
- clipping dirty coats
- not oiling blades often enough
- using overheated blades too long
- relying on one clipper for every task
- ignoring early signs of drag or rough cutting
- storing blades and clippers carelessly
The upside is that these are also the easiest things to improve.
Final thoughts
Most common clipper problems are fixable. Better blade care, better prep, better tool choice, and a more realistic grooming setup solve far more than people expect.
Instead of expecting one machine to handle everything, it makes more sense to build around the way grooming actually works: one clipper for heavier body work, one for flexibility or quieter work, and a trimmer for detail areas. That approach gives you smoother cutting, better finishes, and a calmer experience for the dog.
If you are reviewing your setup, it makes sense to explore the full range of dog grooming clippers and trimmers, along with dog grooming blades and brushes and combs.
Dog grooming scissor maintenance – FAQs
How often should dog grooming scissors be oiled?
Professional dog grooming scissors are usually best oiled daily or every few days, depending on how often they are used. Home groomers can do it less often, but regular oiling still matters, especially before storing scissors away for longer periods.
How often should grooming scissors be sharpened?
Most grooming scissors need professional sharpening every 3 to 6 months. Busy salons, heavy coat types, and high daily usage may mean more frequent servicing.
Why are my grooming scissors folding the coat?
Scissors often fold the coat when there is dirt around the pivot, incorrect tension, or the edge needs sharpening. Cleaning, oiling, and checking tension should always come before assuming the scissors are blunt.
How do I check grooming scissor tension?
A simple drop test works well. Open one blade to around 90 degrees and let it fall naturally. The blade should drop partway and catch. If it slams shut, the tension is too loose. If it barely moves, the tension is too tight.
Can you sharpen dog grooming scissors at home?
A simple drop test works well. Open one blade to around 90 degrees and let it fall naturally. The blade should drop partway and catch. If it slams shut, the tension is too loose. If it barely moves, the tension is too tight.
How should grooming scissors be stored?
Grooming scissors should be stored carefully in a scissor case, pouch, block, or another safe storage solution. Avoid throwing them loose into drawers with clippers, combs, blades, or other metal tools.
 Grooming Bundles
 Salon Equipment
 Dryers & Blasters
 Tables
 Clippers & Trimmers
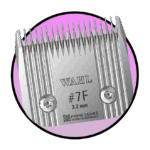 Blades & Attachments
 Baths
Baths Spare Parts
 Scissors
 Brands
 Groomers World Scissors
 Kenchii Scissors
 Roseline
 Straight
 Curved
 Thinner
 Scissor Sets
 Blender & Chunker
 Left Handed
 Shampoo, Spa & Perfume
 All Shampoo
 Wahl Shampoo
 Tropiclean Shampoo
 Mud Bath & Spa
 Fragrance
 Health, Hygiene & Liquids
 Tools
Tools Hand Stripping
 Grooming Aids
 Rakes, Nail Clippers & tools
 Brushes & Combs
 Brushes
 Combs
Combs Extras
 Bandanas & Bows
 Retail
 Leads, Collars & Jackets
 Storage & Stationary
 Offers
 On Sale
 Gift Cards
 Equine
 Equine Clippers
 Equine Blades
 Equine Health, Hygiene & Liquids
 Aesculap
 Aeolus
 Andis
Andis Barbicide
 Bymilo
 Groomers World PRO
 Groomers World
 Groomers World Classic
 Hatchwells
 Heiniger
 Joyzze
 Leucillin
 Oster
Oster Roseline
 Tropiclean
 Wahl
Wahl